

Crocheting a gauge swatch is one of the most important steps before working up your crochet design. I know a lot of crochet makers dread making a gauge swatch, but for a crochet designer…. it’s not optional!
In today’s post, we’re going to cover all things gauge and gauge swatches! By the end of this article, you’ll not only have all the info you need about swatches, but you’ll have a new appreciation for making crochet gauge swatches!
Gauge swatches apply to both knitting and crochet. However, since my focus is on crochet, any references I make to swatches will be geared toward crocheters.
Pin It Now, Read it Later!

What is Gauge?
Before I explain what a gauge swatch is, I believe I should define the term gauge. Gauge is an instrument to take certain measurements according to industry standards. Gauge doesn’t only apply to the fiber world. It also applies to a wide range of things. Let’s take wire for example. All wires have a gauge. When measuring wire, you’re measuring its diameter. This measurement determines the amount of electrical current it can safely carry. These standards were established for the safety of electricians. Another example is film. Film measures gauge according to a specific standard. The standard measurements for film stock are 8 mm, 16 mm, 35 mm. The gauge in film is not a direct measurement but refers to the nominal width of the film, which consists of strips. I’m not a photographer so this one confuses me a bit! The last example are railroads. In the railway system there’s a thing called track gauge. This measures the distance between two rails of a track. Again, there is a standard system of gauge and for the railway, there are various gauges. All trains need to have wheelsets that match the gauge of the rails. If they don’t match gauge, then they can’t travel on that track.
My point is this: Gauge is really important!
What is the Industry Standard in Crochet?
In the crochet world, the standard for a gauge swatch is 4 inches (10 cm) by 4 inches (10 cm). Who came up with these standards? Well, a group of members from the Craft Yarn Council did. These members, which are made up of publishers, yarn manufacturers, hook and needle manufacturers, and fiber manufacturers worked together to come up with a series of guidelines. These guidelines help with consistency on yarn labels, hook labeling, and within published patterns. As a designer or aspiring designer, I encourage you to become familiar with crochet industry standards. Visit the CRAFT YARN COUNCIL to find out more!
What is a Gauge Swatch?
Simply put, a gauge swatch is a small sample of crochet fabric. With this sample, you can measure your gauge. There are two parts to measuring gauge: stitch gauge and row gauge. Stitch gauge is the number of stitches you have across 4 inches of your fabric. Row gauge is the number of rows within 4 inches of your fabric.

When creating a gauge swatch, I always recommend making your sample bigger than 4 inches. The reason for this is that the edges of crochet pieces can be kind of wonky and won’t give you an accurate measurement. When I create a gauge swatch, I always make my fabric pieces 5 inches (13 cm) by 5 inches (13 cm) so I can measure the middle area which will be my true gauge.
“So, how do I work up a 5-inch (13 cm) gauge swatch?”
I knew you would ask that! Let’s say you bought a pattern, and the designer listed her gauge as follows:
Gauge: 14 HDC x 11 rows = 4” (10 cm)
She’s working with an H-8 (5.5 mm) crochet hook. You would first figure out how many stitches and rows equal 1 in. To do this, you would divide the stitch count (14) by the size of the swatch (4).
14÷4=3.5
So, the designer’s gauge is 3 and a half stitches per inch. Now, to figure out how many stitches will need for a 5-inch swatch, multiply 3.5 x 5 = 17.5 stitches. To make a swatch that is 5 inches, you would need 17 and a half stitches. Of course, half a stitch is not possible so I would suggest rounding to the nearest stitch!
So, to make a 5-inch swatch, you’ll need 18 half double crochets. To create your swatch, you would use the size yarn and hook the designer recommends, chain 20 (because we’re counting for the 2 turning chains), HDC in the 2nd CH from hook and in each stitch across. You should have 18 stitches. Once you reach the end, you would chain 2 for the turning chain, turn your work and HDC in each stitch across. Continue in that manner until your piece reaches 5 inches.
What if you’re a designer needing to make a swatch of her newest design?
Once you’ve figured out your design, the hook you’ll use, the yarn you want, and the stitch pattern you’re going to work with for your design, it’s time to work up a gauge swatch! Create a number of chains, according to your stitch pattern, that equal about 4 to 4 ½ inches long. Don’t forget to account for your turning chains! Then you’ll work your rows according to your stitch pattern. After working two or three rows, measure the width of your swatch. If it measures smaller than 5 inches, start over and add a few chains at the beginning so it’s as close to 5 inches as possible. If it’s a little bigger than 5 inches, I would keep going! The main thing is that we’re wanting to measure the middle section of the swatch to check our gauge.
What Affects Gauge and How to Fix It?
There are several things that affect the gauge of your swatch.
- Yarn Weight: The weight of your yarn will greatly affect the size of your swatch! A bulkier yarn will produce larger stitches whereas a finer yarn will give you smaller stitches! Also, the way you hold your yarn will also affect your gauge. If your tension on your working yarn is tight then your stitches will be smaller and if you tension is loose, then your stitches will be bigger.
- Hook size: Just like yarn, larger hooks create bigger stitches and smaller hooks create smaller stitches. The material of a hook can also affect your gauge. The various parts of the hook can have a great effect on your gauge! The shape of the head, the curve of the mouth, the form of the lip, and most definitely the size of the throat will all affect gauge. Not to mention the way you hold your hook can also have an effect on your gauge.
- Stitch Pattern: Different stitch patterns can produce different size swatches! A single crochet swatch will have more stitches per inch than a double crochet swatch because a single crochet is a smaller stitch than a double crochet. The varying stitch patterns can either spread the fabric out and require fewer stitches or pull the fabric in requiring more stitches to complete your swatch.
- Mood: If you used the same yarn, same hook, sat in the same spot, at the same time on two separate days and created a gauge swatch, chances are, they would be two different sizes. The swatch you created on Monday when you were refreshed from a relaxing weekend may have a looser tension because you were happy, relaxed, and ready to conquer the week. The swatch you created on Friday after a long week of tackling tasks (and children), a huge fight with your husband, an unexpected bill, and a nasty comment from a follower might cause your tension to be tight like you’re trying to strangle all your worries!
If you find yourself needing to adjust your gauge, no worries! Here’s how to identify the problem in your gauge and adjust it easily!
Let’s use the gauge that I listed previously: Gauge: 14 HDC x 11 rows = 4” (10 cm)
Let’s first talk stitch count. You’ve worked up your gauge swatch with the yarn weight and hook size the designer listed but you don’t have 14 half double crochets. You need to adjust your tension! Do you have more stitches? Then your tension is too tight. Not enough stitches? Then your tension is too loose! If your tension is too tight, go up a hook size. If your tension is too loose, go down a hook size.
More = up
Less = down
Now let’s talk row count. If there’s not a specific row repeat the designer is using, then you can easily adjust your row count by adding or taking away rows. Not that big of deal. However, if there is a particular row repeat in the pattern, then row count will definitely matter. The height of your row is determined by the height of the first stitch you draw up through the loop…. the golden loop!
When you work your next gauge swatch, move slowly and watch the height of that first loop you draw up, if the golden loop is tight, then the height of your stitch will be bit a shorter, if your golden loop is loose, then your stitch height will be tall! You can adjust your row gauge by adjusting your golden loop!
Why is Working a Swatch Important When I Design a Project?
Whether you like it or not, crochet is all about math! Get your math right and your crochet project will be perfect! Don’t work the math before starting and you might find yourself in a designing nightmare!
Taking the time to swatch a 5-inch square will save you so much frustration and money! A simple gauge swatch of your design will give you all the information you need to determine:
- Your starting stitches: Starting stitches are the number of stitches needed to start your project and determine its width. You can determine your starting stitches by doing a little basic math with the numbers from your gauge.
- Your Row/Round count: Your gauge swatch will help also help you determine how many rows or rounds you need to work for the height of your project.
- How much yarn you’ll need: Have you ever bought too much or too little yarn for a project? I have too! However, working some basic numbers from your gauge swatch will help you get the exact yardage needed for your design. No more wasted money!
- How many squares needed: If you’re creating a design using squares, then working a little math from your swatch will help you know exactly how many squares will be needed for your design!
Did you know that a little square of crochet fabric could be so important and valuable!? I bet you thought this whole time that creating a gauge swatch was to help makers! The benefits of a gauge swatch are really for the designer!
I’ll help you walk through all the math when designing next month when we design our first project together! Post in the comments what you’d like to design!
Is There a Difference When Working Projects in Rows and Rounds?
Yes! There’s a huge difference when working swatches in rows and rounds!
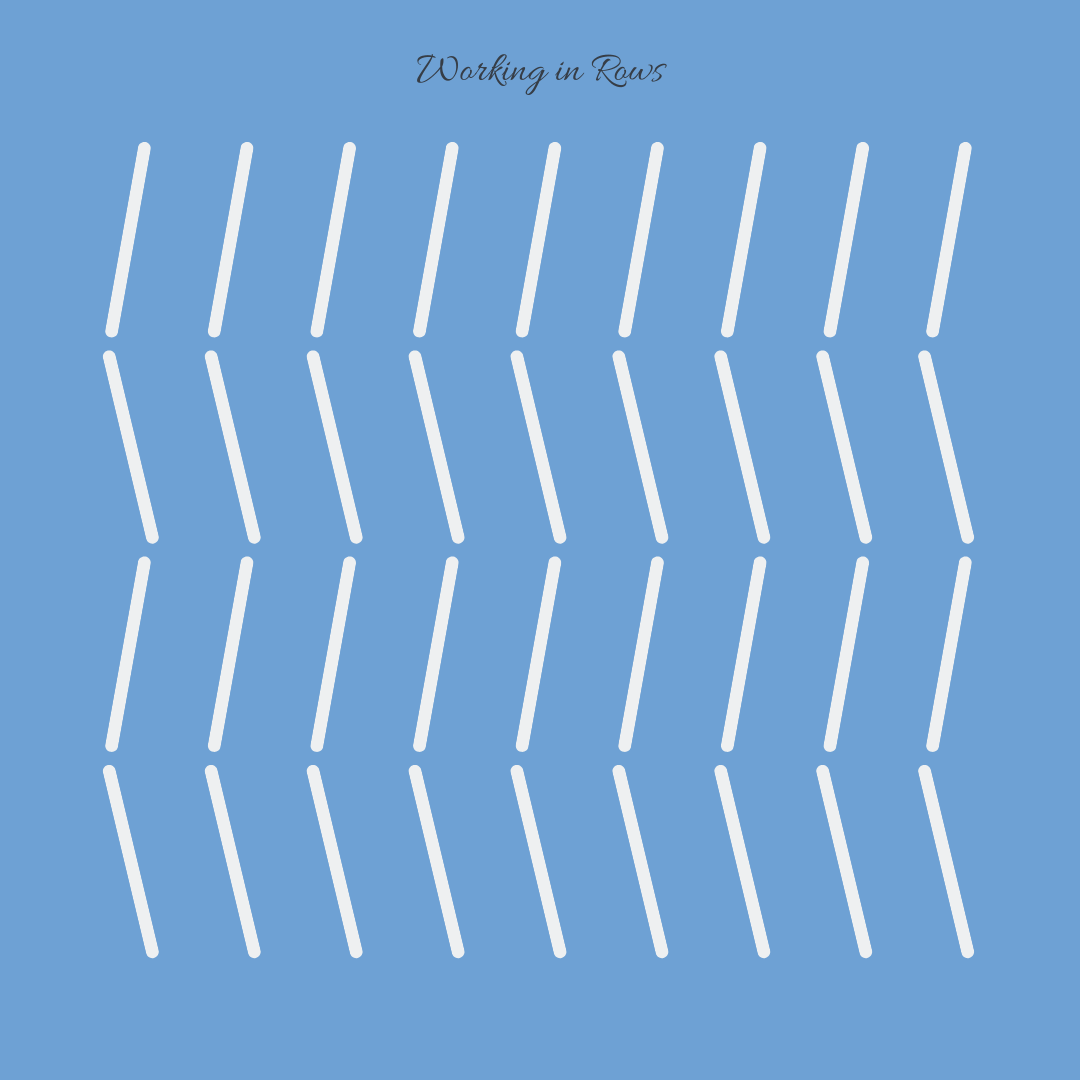
When working your swatch or project in rows, you crochet from one side to the other then turn at the end of the row. The first row you create will lean to one side, then the next row you create will lean in the opposite direction. This will create a piece of fabric that the stitches look like this:
When working your swatch or project in rounds, you don’t turn your work at the end…you just keep going! You crochet on the same side all the up! All your stitches will lean to one side and create a fabric piece where the stitches look like this:

I’ve already explained how to work your swatch up in rows but let me share how to work a gauge swatch in rounds!
You begin the same way you would when working a row, chain a set number of stitches the length of 4 to 4 ½ inches. Work your stitches into the chains the same way you would for a row. At the end of the first row, instead of turning, chain the same number of chains you started with + 10. Then, without turning, work your second row as if you were working in the round. Continue in that manner until your swatch is 5 inches. The front of your fabric will have stitches that all lean in the same direction and the back of your fabric will have rows of chains!
How Do I Write Gauge in My Pattern?
When listing your gauge in your pattern you can write it a few ways:
X sts and X rows/rounds = 4 in (10 cm) in XX stitch
X sts = 4 in (10 cm) = X rows/rounds in XX stitch
X sts by X row/rounds = 4 in (10 cm)
Remember, the standard gauge for a crochet swatch is 4 inches. However, sometimes you’ll need to list an additional gauge for smaller portions of your pattern, like the brim of a beanie. If you need to add an additional gauge, you will follow the same format as above, except list in 1 in (2.5 cm).
Share in the comments below and let me know if this article changed your mind about gauge swatches?

CHECK OUT THE CLOVER GAUGE RULER or AKERWORKS SWATCH GAUGE
If You Missed the Other Articles in the Designer Series Check Them Out HERE!